
To kick off our “build along” series, we decided to try and build this “full sized” RC Benchy. A Benchy is a “stress test” 3D printed object. There are literally hundreds of “benchy” designs out there. Some of you may have seen our “What is a “Benchy” and is it Art” article which talks about the different Benchys.

When we ran across this RC Benchy by Thullen on Thingiverse.com we were impressed and decided to make this the subject of our build along.
Thullen created a simple, easy to construct, RC Benchy which can be printed on any common 220mm x 220mm printer. It also uses rather common RC components that can be cheaply obtained. We will be listing out what we used as we go, so that you can follow along if you wish.
Getting Started….
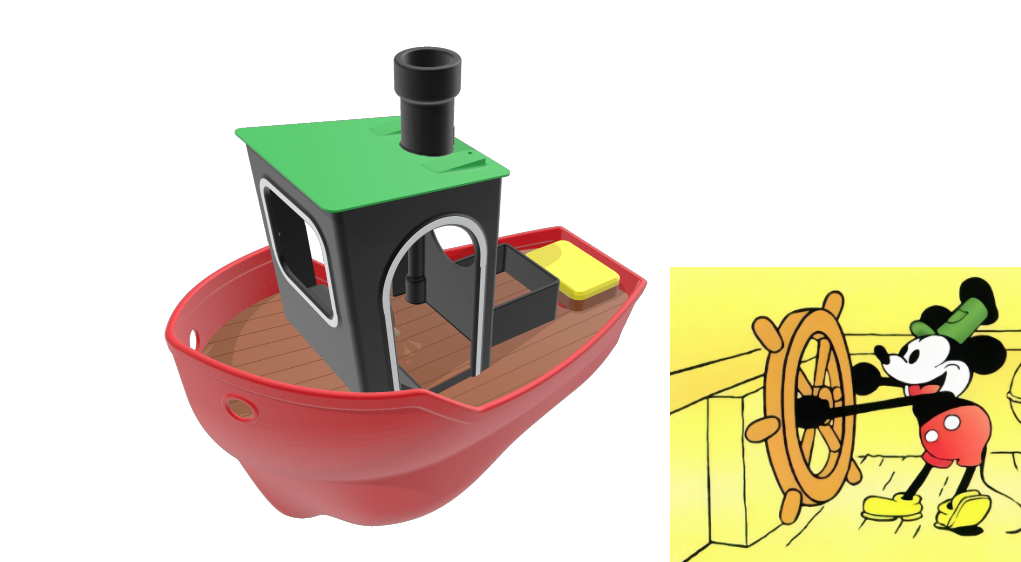
Our Inspiration for a Benchy Color Scheme
Since each Benchy has its own “character” and “style”, for a color scheme we decided to take our inspiration from Mickey Mouse’s Steamboat Willie cartoon!

Or, more specifically, from the color scheme of Mickey himself. So, to that end, we decided to start out printing the “hull” of our ship Red, just like Mickey’s pants. Besides, starting with printing the hull is a great place to start……
For our ship’s hull, the red PLA filament we will be using is from Preline. We have had great success with them, and the bright red should look nice.

Thullen has the front (or bow) of the boat available to print in one or two parts. We chose to print the single piece version, as our printer (CS-30) is well tuned. So, the part we are printing will be HULL_FRONT+BOW_ONEPIECE.stl
The best way to print this part is as shown here on your print bed. If you print it this way, no supports are needed….

Some Printing Tips for your Slicer:
When you go to slice this part (or any piece with small edges) it’s always a good idea to preview the part to see if you need to “tweak” anything. On our slicer (Simplify3D) we found that we needed to adjust how the thin walls would be printed, to make the print a bit more “solid”. In Simplyfy3D, this feature is listed in the “Advanced” tab. Here is how we altered the values to obtain solid walls at the thinnest part of the hull:

By making these changes, these thin walls came out this way on the hull piece we are starting out with….

Printing the 1 piece forward hull takes a while. Our slicer reports about 16 hours.
Editor’s note: Imagination-3d.com is in no way part of, endorsed or authorized by, or affiliated with the Walt Disney Company or its affiliates. All depictions or references made here are for commentary only. As to Disney artwork/properties: © Disney
Bow Results:
Our first piece, the Bow, came out great.


It took approximately 17 hours to print this forward hull. The modified Creasee CS-30 does an excellent job of printing a large item like this, in conjunction with Simplify3D.
The Aft Hull
The aft hull is printed in a similar manner, facing down. In neither case did either part require any supports. The creator of this Benchy recommends a brim to avoid warping, but we didn’t use one and didn’t encounter any problems. The aft hull took about 17 hours also, again using 15% infill.


The author included 2 different aft hulls. The choice of which one to print is based on the outer diameter of the drive assembly you choose. He said:
“Propeller shaft: 4mm diameter 10 cm long, with a sleeve that is 5 cm long and 9.5 or 8 mm diameter (there are two STP-files for the aft hull, one for each sleeve diameter) and a 36mm propeller for submerged use (not a high speed propeller).” We searched Ebay, and were able to obtain this one from China in about 2 weeks:
But more on this assembly later.
The Stand
It’s a great idea to print out the stand at the start of your build. Using 15% infill the stand takes a little over 6 hours to print. Again, no supports are required. This not only provides you with a grand way to display your RC Benchy, but, also provides a “dry dock” of sorts to hold hit while you are building!
Joining the Parts of the Hull
Thullen had a good idea for lining up the parts of his hull. What he did was add some small holes in each part that you could use to line the front and back of the ship up, by taking a very short piece of filament (about 4mm) and inserting it in each hole.

What we found was that after printing, to get the filament joiner to fit, we had to ream out each hole slightly because of the first layer “squish” to the build plate. A KS or Harbor Freight Needle file makes quick work of this.
Once this is done, both parts look great together.

Gluing the Hull Together:
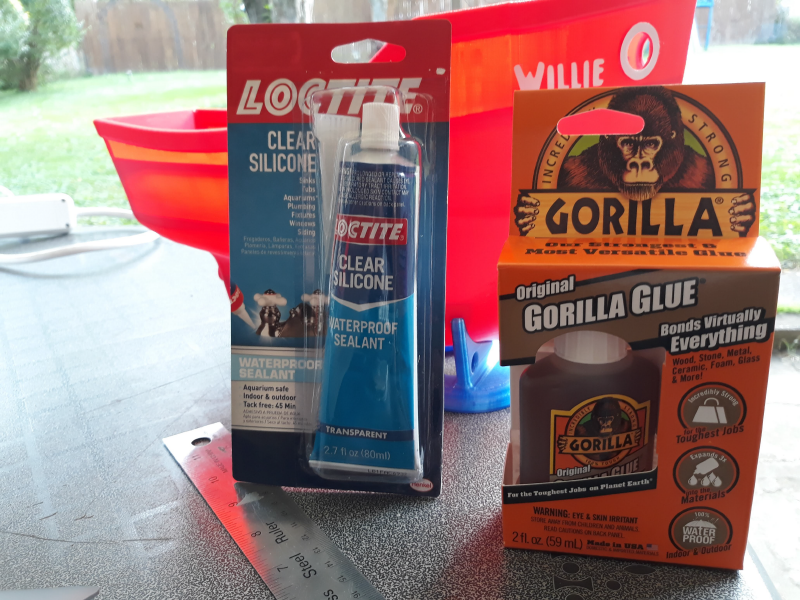
- Before gluing the hull, we decided we needed some way to “clamp” the two parts together securely, in order to get a good bond. As always, or “glue of choice” is Acrylic Cement from Amazon,( SCIGRIP 16 10315 Acrylic Cement, Low-VOC, Medium bodied, 5 Ounce Tube, Clear).

The solution we came up with was rather simple (and cheap). That solution is to use dollar store binder clips to hold the parts together.
Glue was applied to both sides and the clips installed like this:

Editors note to Thullen: Besides adhesive, you might consider adding two holes for M3 hardware where the two parts meet. This would provide added strength at the joint.
Adding some “Disney Bounding” to our RC Benchy:
In the “spirit” of Steamboat Willie, it was time to add some “bling”

Before gluing on the transom (back end) of our ship, we decided it was time to get started making things look like a ship Mickey would pilot. To do this, we designed a custom “Mickey hand” for the transom itself. It would be easier to add this before gluing on the transom

We also applied some detail by outlining the forward port holes with accents:

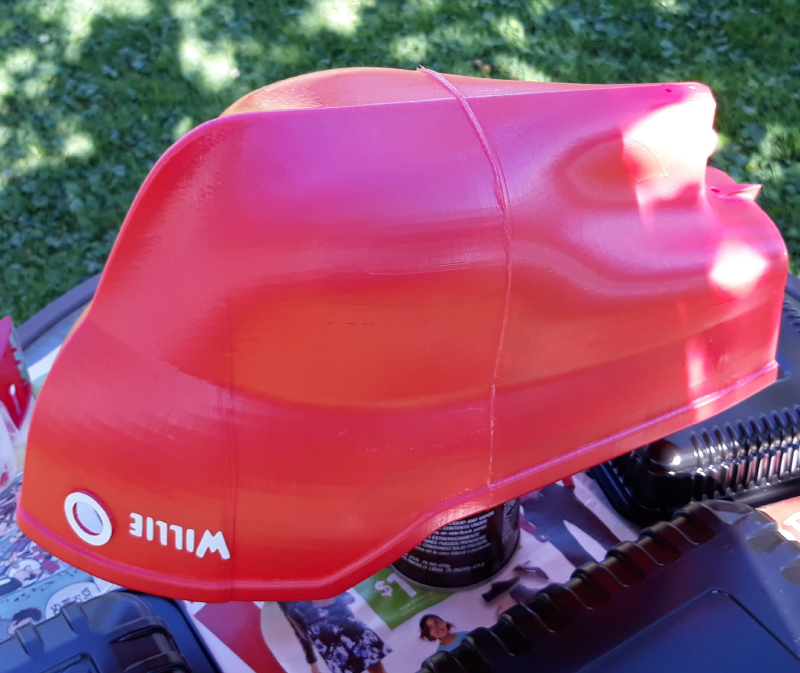
And of course, Mickey’s ship would not be complete without a name!

Making the Ship “Waterproof”
Since we are printing with PLA filament something needs to be done to make the ship waterproof or “watertight” (as it is sometimes called). Printed layer upon layer, while appearing “solid” there are small gaps. These gaps will allow water to penetrate the hull of our ship. So, to prevent it from sinking some have used two-part epoxy and / or paint to seal their ship.
We really like the look of our RC Benchy, so rather than use paint or two-part epoxy, (which can be costly) we decided to try something a bit different. Instead, we decided to take a “two part” approach, water proofing both from the inside and outside. Also, the seams where we joined the sections of the hull needed to be delt with as well, just to deal with any joint “imperfections”.
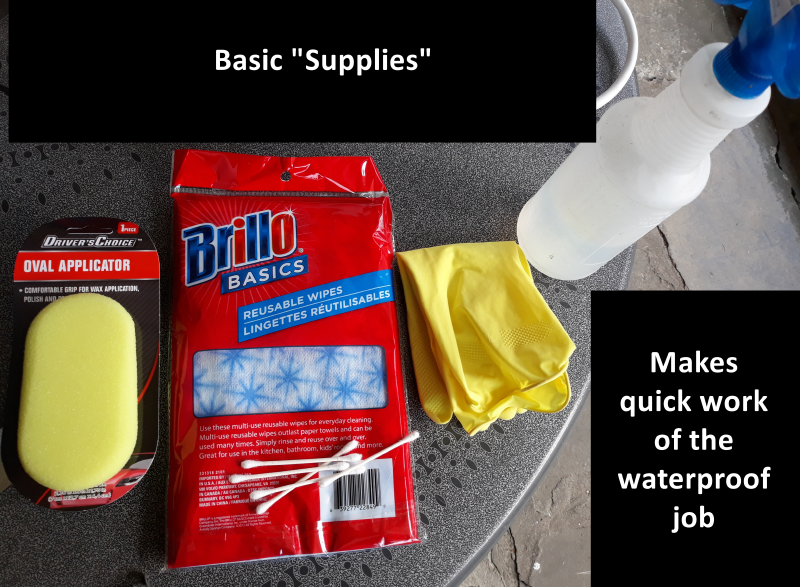
Supplies for Sealing the Hull
Here are the basic supplies we used to seal our hull from the inside:
Sealing the Hull Joints
First, to seal each hull joint we used a tube of Loctite Clear Silicon waterproof sealant and some blue painter’s tape.

Not much is required of either. Two strips of tape were applied on either side of each seam, then a very thin bead of the sealant was applied. We used some cheap gloves to both smooth the seam as well as force as much silicone as possible into the joint. This was allowed to completely cure before moving on to the next step.
Giving the Gorilla a Go! Sealing the interior
For waterproofing the inside, we used a cheap sprayer filled with water to “spritz” the inside of our haul. Then Gorilla glue was applied with a deal sponge and cotton swab tips to get in all the hard-to-reach places.

The water acts as an “activator” for the glue, causing it to foam and fill in the PLA gaps. Cheap, effective, and fast.

If you choose to use this method, be sure to wipe up any areas you do not wish to get “filled” with glue! We allowed this to dry completely before moving back to the exterior of the ship.
Sealing the Exterior of the Ship
To seal the exterior of the ship, we used some Rustoleum Varathane (Polyurethane).

It is self-leveling, and you can apply many coats in a short period of time. We applied 12 coats, waiting an hour or so between each coat.

Once the final coat was applied, we let it fully cure for over 24 hours.
Up next, installing the propulsion system. Stay tuned!
Let the building begin!